The largest nominal size for Schedule 80 PVC pipe manufactured under ASTM D1785 is:
24 inches (NPS 24)
Key details
- Standard coverage: ASTM D1785 formally specifies Schedule 80 PVC pipe from 1/8″ through 24″
- Outside Diameter (OD) at 24″: 24.000 in
- Use case: High-pressure industrial, chemical, water, and process piping
- Above 24″: Sizes like 30″ or 32″ are sometimes marketed as “Sch 80–like,” but they are NOT ASTM D1785 compliant and usually fall under custom extrusion or other ASTM standards (e.g., AWWA or SDR-based specs)
Important clarification
If compliance matters (engineering specs, inspections, government or industrial jobs):
Only up to 24″ can be called true SCH 80 PVC per ASTM D1785. At 247Garden, we currently stock up from 1/2 inch to 1 inch schedule-80 PVC pipes. If you are interested, please give us a call 323-318-2600 or text us at this number. Thank you and please have a nice day!
If you want, I can:
- Show pressure ratings at 24″
- Compare ASTM D1785 vs AWWA C900/C905 for large diameters
- Help verify whether a 30″–32″ pipe spec is actually compliant or just nominal
Just tell me what you need next.
[related_products is_auto_added="1"]The largest nominal size for Schedule 80 PVC pipe manufactured under ASTM D1785 is: 24 inches (NPS 24) Key details Important clarification If compliance matters (engineering specs, inspections, government or industrial jobs): Only up to 24″ can be called true SCH 80 PVC per ASTM D1785. At 247Garden, we currently stock up from 1/2 inch […]
Below is the ID, OD, and Circumference table for Schedule-80 PVC high-pressure pipe manufactured to ASTM D1785, covering 3/8″ through 24″ nominal pipe size (NPS).
Notes
- OD (Outside Diameter) is fixed by NPS (same for Sch-40 & Sch-80).
- ID (Inside Diameter) is smaller for Sch-80 due to thicker walls.
- Circumference is calculated from OD:
[
C = \pi \times \text{OD}
] - Units are inches.
Schedule-80 PVC Pipe Dimensions — ASTM D1785
| Nominal Size (NPS) | OD (in) | ID (in) | Circumference (in) |
|---|---|---|---|
| 3/8″ | 0.675 | 0.423 | 2.12 |
| 1/2″ | 0.840 | 0.546 | 2.64 |
| 3/4″ | 1.050 | 0.742 | 3.30 |
| 1″ | 1.315 | 0.957 | 4.13 |
| 1-1/4″ | 1.660 | 1.278 | 5.22 |
| 1-1/2″ | 1.900 | 1.500 | 5.97 |
| 2″ | 2.375 | 1.939 | 7.46 |
| 2-1/2″ | 2.875 | 2.323 | 9.03 |
| 3″ | 3.500 | 2.900 | 11.00 |
| 3-1/2″ | 4.000 | 3.364 | 12.57 |
| 4″ | 4.500 | 3.786 | 14.14 |
| 5″ | 5.563 | 4.767 | 17.47 |
| 6″ | 6.625 | 5.709 | 20.81 |
| 8″ | 8.625 | 7.565 | 27.10 |
| 10″ | 10.750 | 9.493 | 33.78 |
| 12″ | 12.750 | 11.294 | 40.05 |
| 14″ | 14.000 | 12.410 | 43.98 |
| 16″ | 16.000 | 14.250 | 50.27 |
| 18″ | 18.000 | 16.100 | 56.55 |
| 20″ | 20.000 | 17.850 | 62.83 |
| 24″ | 24.000 | 21.550 | 75.40 |
Below is the ID, OD, and Circumference table for Schedule-80 PVC high-pressure pipe manufactured to ASTM D1785, covering 3/8″ through 24″ nominal pipe size (NPS). Notes Schedule-80 PVC Pipe Dimensions — ASTM D1785 Nominal Size (NPS) OD (in) ID (in) Circumference (in) 3/8″ 0.675 0.423 2.12 1/2″ 0.840 0.546 2.64 3/4″ 1.050 0.742 3.30 1″ […]
Throughout 2025, customers continued to share overwhelmingly positive feedback about their experiences with 247Garden. With more than 1,100 lifetime reviews and an lifetime average rating of 4.9 stars, the past year highlights consistent strengths in product quality, pricing, and customer service.

Overall Customer Satisfaction
The majority of reviews in 2025 were five-star ratings. Customers frequently described 247Garden as dependable, efficient, and trustworthy. Many noted that their experience exceeded expectations, particularly when factoring in price and delivery speed.
Phrases such as “customer for life,” “one in a thousand,” and “exactly what online buying should be” appeared repeatedly across reviews.

Product Quality and Reliability
Product quality was one of the strongest points mentioned throughout the year. Customers consistently praised the durability and accuracy of the products, especially Schedule 40 PVC fittings and fabric grow bags.
Several reviewers noted that the materials met or exceeded industry standards and were exactly as described. Many customers admitted they were initially skeptical due to the low prices but were impressed upon receiving their orders.

Shipping and Delivery Experience
Shipping speed was frequently mentioned and generally viewed positively. Many customers reported receiving their orders earlier than expected, even during peak seasons and holidays.
Some reviewers expressed concerns about shipping costs, particularly for smaller or bulkier items, and a few noted carrier-related delays. However, many also stated that overall savings still outweighed shipping costs compared to purchasing locally.
Customer Service Experience
Customer service stood out as a key differentiator in 2025. Reviews frequently highlighted prompt responses, proactive communication, and hassle-free resolution of issues.
Customers appreciated the willingness of staff to correct mistakes quickly, provide replacements, or issue refunds when needed. Several reviews noted that problems were addressed before customers even had a chance to report them.

Competitive Pricing and Value
Pricing remained one of the most commonly praised aspects of 247Garden. Customers frequently compared prices to big-box retailers and reported significant savings, especially on large or specialty orders.
Contractors, DIY builders, and gardeners alike noted that even with shipping costs included, 247Garden often offered the best overall value.
Customer Base and Use Cases
Reviews from 2025 reflect a diverse customer base, including home gardeners, professional plumbers, contractors, small businesses, nonprofits, and DIY project builders. Many customers mentioned using 247Garden products for specialized or hard-to-find applications that local stores did not carry.
Opportunities for Improvement
While feedback was overwhelmingly positive, some customers mentioned areas for improvement, including clearer product descriptions for first-time buyers, more transparency in shipping costs, and broader inventory depth in certain categories.
These comments appeared infrequently but provide useful insight for continued growth.
Closing Summary
Customer feedback in 2025 reinforces 247Garden’s reputation as a reliable, affordable, and customer-focused supplier. High repeat purchase rates and strong word-of-mouth recommendations suggest lasting trust and satisfaction.
As one customer succinctly stated:
“They say what they do and do what they say.”
Feel free to let us know how we are doing as a business! All feedbacks are welcomed! We appreciate your business and please have a nice day!
[related_products is_auto_added="1"]Throughout 2025, customers continued to share overwhelmingly positive feedback about their experiences with 247Garden. With more than 1,100 lifetime reviews and an lifetime average rating of 4.9 stars, the past year highlights consistent strengths in product quality, pricing, and customer service. Overall Customer Satisfaction The majority of reviews in 2025 were five-star ratings. Customers frequently […]
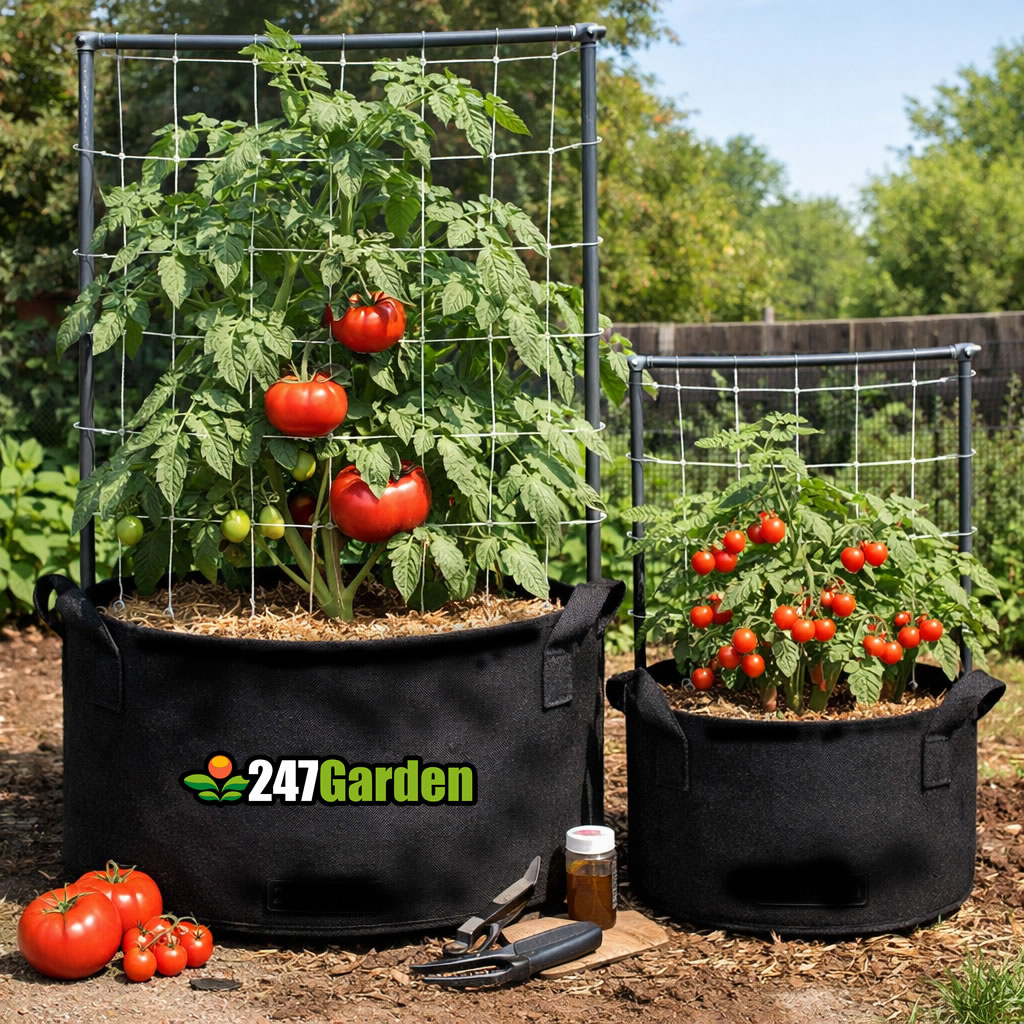
For healthy tomato plants you generally want at least 5–10 gallons per plant, and 10+ gallons is even better for large slicing types.
Good Options from 247Garden
- 5-Gallon Aeration Fabric Pot (about 12" diameter × 10" high) – good minimum size for smaller tomatoes or early growth stage. Best for Husky Cherry Red if you water and feed carefully.
- 7-Gallon Aeration Fabric Pot (about 13" diameter × 12" high) – a better everyday size for cherry/medium tomatoes and compact indeterminates.
- 40-Gallon Aeration Fabric Pot (about 26.5" diameter × 17" tall) – this is much larger and gives excellent space for big indeterminate plants like Red Beefsteak. Larger size promotes stronger root systems, more water/nutrient reserves, and larger plants overall.
Sizing rule of thumb:
- For Husky Cherry Red: a 7-gallon or larger pot is ideal, but a 5-gallon can work with more frequent watering.
- For Red Beefsteak (large indeterminate): aim for 15–30+ gallon size if possible; the 40-gallon bag from 247Garden gives you plenty of room without needing to monitor moisture as aggressively.
Note: Smaller pots dry out faster and require more frequent watering and feeding. Bigger bags buffer those fluctuations well.
Soil and Potting Tips
- Use a light, nutrient-rich potting mix with good drainage (potting soil + compost + perlite/coco coir).
- Fill the pot nearly to the top. Tomatoes like to be buried deep to form extra roots along the stem.
- Water thoroughly until it drains through the pot. Check soil moisture frequently, especially in fabric bags in warm weather. Larger bags retain moisture better.
Trellis and Support Tips (Including Trellis Netting)
Tomatoes benefit hugely from vertical support:
Types of support structures
- Trellis netting hung from a frame or overhead support:
- Position a sturdy frame next to or around the pot.
- Hang netting vertically behind the plant.
- Gently guide stems through the netting as they grow to train them up.
- T-posts or stakes inside the pot or beside it: tie plant loosely and move ties as it grows.
- Florida weave method: stretch twine between stakes every foot of height and weave stems through.
Training practices
- Start training early — once seedlings are 6–12" tall.
- Guide main stems up through the trellis as they grow.
- Optionally remove lower leaves and suckers (small side shoots) to focus plant energy and improve airflow.
- Tie loosely so stems can flex in wind without damage.
Watering & Feeding
- Fabric pots drain fast but also dry faster, so check daily in warm weather.
- Water deeply rather than shallow frequent sprinkles; soil should stay evenly moist but not soggy.
- Feed with a balanced fertilizer during vegetative growth, then switch to a tomato-specific formula during flowering and fruiting.
Common Mistakes to Avoid
- Too small pots: restrict roots, increase watering stress, reduce yield. A 5-gallon bag can work in a pinch, but 7–10+ gallons is much better for cherry tomatoes and 15–40+ gallons for big slicer types.
- Under-watering: fabric pots expose soil to air; not watering enough leads to stress.
- Poor support: tall indeterminate tomatoes need strong support or they flop.
Summary
- Choose 247Garden fabric pots sized appropriately: 7 gallons is a solid all-round choice for cherry types; a 40-gallon bag gives excellent room for big beefsteaks.
- Use trellis netting with a frame or stakes to train vines upward.
- Use quality soil and keep moisture consistent.
For healthy tomato plants you generally want at least 5–10 gallons per plant, and 10+ gallons is even better for large slicing types. Good Options from 247Garden Sizing rule of thumb: Note: Smaller pots dry out faster and require more frequent watering and feeding. Bigger bags buffer those fluctuations well. Soil and Potting Tips Trellis […]
Understanding ASTM D1784 PVC Pipe and Fittings and Why 247Garden Is a Trusted Source
When selecting PVC pipe and fittings for irrigation, plumbing, industrial, or filtration systems, most buyers focus on pressure ratings and sizes. However, one of the most important standards behind reliable PVC products is ASTM D1784. This material standard plays a critical role in determining the strength, durability, and consistency of PVC components used in real-world applications.
At 247Garden, ASTM D1784–compliant PVC pipes and fittings are carefully selected to meet demanding performance requirements while remaining affordable and readily available.
What Is ASTM D1784?
ASTM D1784 is the material specification for rigid PVC and CPVC compounds. Unlike other ASTM standards that define pipe dimensions or pressure ratings, ASTM D1784 focuses on the quality of the PVC material itself.
This standard establishes a classification system that evaluates key material properties, including:
- Tensile strength
- Impact resistance
- Modulus of elasticity
- Heat deflection temperature
Most pressure-rated PVC products used today are manufactured using PVC cell class 12454, one of the most common and trusted classifications under ASTM D1784.
Why ASTM D1784 Matters for PVC Pipe and Fittings
ASTM D1784 ensures that PVC products are made from consistent, high-quality resin compounds. This consistency provides several important benefits:
- Reliable pressure performance over time
- Compatibility between pipes and fittings from different manufacturers
- Resistance to cracking, deformation, and premature failure
- Confidence that products meet industry and code expectations
Without ASTM D1784, there would be no standardized way to verify the structural integrity of PVC materials before they are formed into pipes or fittings.
How ASTM D1784 Relates to Other PVC Standards
ASTM D1784 works in conjunction with other well-known PVC standards:
- ASTM D1785 defines dimensions and pressure ratings for Schedule 40 and Schedule 80 PVC pipe
- ASTM D2466 and ASTM D2467 apply to Schedule 40 and Schedule 80 PVC fittings
- NSF-61 certifies safety for potable water applications
In short, ASTM D1784 confirms the material quality, while these other standards ensure proper sizing, pressure handling, and application suitability.
Recommended ASTM D1784 PVC Pipe and Fittings from 247Garden
247Garden offers a wide selection of PVC components manufactured from ASTM D1784–compliant materials, making them suitable for both professional and DIY applications.
PVC Pipe Options
- Schedule 40 and Schedule 80 PVC pipe made from rigid PVC compounds meeting ASTM D1784
- Compatible with standard ASTM D1785 dimensional requirements
- Ideal for irrigation systems, water supply lines, filtration setups, and industrial fluid handling
PVC Fittings
- Schedule 40 PVC fittings meeting ASTM D2466
- Schedule 80 PVC fittings meeting ASTM D2467
- Available in common sizes such as 1/2 inch, 3/4 inch, 1 inch, and larger
- Strong, thick-walled designs for pressure and durability
Many 247Garden PVC fittings are also NSF-certified, making them suitable for potable water systems when required.
Common Applications for ASTM D1784 PVC Products
ASTM D1784 PVC pipe and fittings from 247Garden are commonly used in:
- Irrigation and agricultural systems
- Gardening and greenhouse installations
- Reverse osmosis and water filtration systems
- Industrial fluid transport
- Pool, spa, and water feature plumbing
These applications demand consistent material strength, which is why ASTM D1784 compliance is essential.
Why Choose 247Garden for ASTM D1784 PVC Products
247Garden focuses on supplying dependable PVC components that meet recognized industry standards without excessive cost. Customers benefit from:
- ASTM-compliant materials
- Clear product specifications
- Competitive pricing
- Reliable availability for ongoing projects
Whether you are building a small garden irrigation system or maintaining a high-pressure water line, using ASTM D1784 PVC pipe and fittings from 247Garden helps ensure long-term performance and peace of mind.
Final Thoughts
ASTM D1784 is the foundation standard that defines the quality of rigid PVC materials used in pipes and fittings. When paired with proper dimensional and pressure standards, it delivers strength, consistency, and reliability across countless applications.
For dependable ASTM D1784 PVC pipe and fittings, 247Garden offers trusted solutions designed to meet real-world needs across gardening, irrigation, and industrial systems.
[related_products is_auto_added="1"]Understanding ASTM D1784 PVC Pipe and Fittings and Why 247Garden Is a Trusted Source When selecting PVC pipe and fittings for irrigation, plumbing, industrial, or filtration systems, most buyers focus on pressure ratings and sizes. However, one of the most important standards behind reliable PVC products is ASTM D1784. This material standard plays a critical […]
PVC pipe is widely used in plumbing, irrigation, agriculture, and industrial applications due to its durability, corrosion resistance, and affordability. Two of the most common types are Schedule 40 PVC and Schedule 80 PVC. While they may look similar at first glance, there are important differences that affect performance, safety, and long-term reliability.
At 247Garden, we regularly help customers choose the correct pipe for their application. This guide explains the key differences between Schedule 40 and Schedule 80 PVC pipe and why 247Garden recommends Schedule 80 PVC pipe for many water and pressure-related uses.
What Does “Schedule” Mean in PVC Pipe?
The term “schedule” refers to the wall thickness of the pipe. Both Schedule 40 and Schedule 80 PVC pipes share the same outside diameter for a given size, which means they can use the same fittings. The difference is the thickness of the pipe wall and the resulting strength.
Schedule 40 PVC has a thinner wall and is lighter in weight.
Schedule 80 PVC has a thicker wall, making it stronger and more pressure resistant.
Key Differences Between Schedule 40 and Schedule 80 PVC Pipe
Wall Thickness
Schedule 80 PVC has significantly thicker walls than Schedule 40. This added thickness increases durability and resistance to cracking, deformation, and impact damage.
Pressure Rating
Because of its thicker walls, Schedule 80 PVC can handle higher internal pressure. This makes it better suited for pressurized water systems and demanding installations.
Weight
Schedule 40 is lighter and easier to handle, which can be helpful for simple residential projects. Schedule 80 is heavier due to its thicker walls but offers greater structural integrity.
Cost
Schedule 40 is generally less expensive upfront. Schedule 80 costs more but often provides better long-term value in applications where strength and reliability are critical.
Typical Applications
Schedule 40 is commonly used in low-pressure irrigation, drainage, and vent systems.
Schedule 80 is commonly used in high-pressure water lines, commercial irrigation, industrial systems, and exposed or underground installations.
Pressure Ratings and Real-World Performance
Pressure rating is one of the most important differences between Schedule 40 and Schedule 80 PVC pipe.
Schedule 40 PVC pipes are typically rated for lower pressure, depending on size and temperature.
Schedule 80 PVC pipes can handle significantly higher pressure under the same conditions.
In systems with fluctuating pressure, pump-driven flow, or long-term continuous use, the added pressure capacity of Schedule 80 provides an extra margin of safety and durability.
Why 247Garden Recommends Schedule 80 PVC Pipe
At 247Garden, we focus on offering products that meet professional standards while remaining cost-effective for homeowners, growers, and contractors.
247Garden Schedule 80 PVC Pipes offer several key advantages:
NSF-61 Certified for Drinking Water
Our Schedule 80 PVC pipes are NSF-61 certified, making them safe for potable water applications. This certification ensures the pipe does not leach harmful substances into drinking water and meets strict health and safety requirements.
ASTM D1785 Compliant
All 247Garden Schedule 80 PVC pipes meet ASTM D1785 standards. This specification governs material quality, dimensional accuracy, and pressure ratings for PVC pressure pipe, ensuring consistent and reliable performance.
High Strength and Durability
The thicker wall design provides better resistance to pressure, impact, and environmental stress. This makes Schedule 80 ideal for long-term installations, especially in demanding environments.
Competitive Pricing
247Garden offers Schedule 80 PVC pipes at competitive pricing, making professional-grade pipe accessible without unnecessary markup.
Common Uses for Schedule 80 PVC Pipe
Schedule 80 PVC pipe is well suited for applications such as:
High-pressure water supply lines
Commercial and agricultural irrigation systems
Greenhouses and hydroponic setups
Underground or exposed pipe installations
Industrial fluid handling systems
Any project where safety, strength, and durability are priorities
Choosing the Right PVC Pipe for Your Project
When deciding between Schedule 40 and Schedule 80 PVC pipe, consider the following factors:
Operating pressure of the system
Whether the pipe will be exposed or buried
Whether the system carries drinking water
Expected lifespan and long-term reliability
Overall project cost versus performance needs
While Schedule 40 may be sufficient for basic, low-pressure applications, Schedule 80 provides added protection and peace of mind in more demanding systems.
Final Recommendation
Schedule 40 PVC pipe is a practical choice for light-duty and low-pressure applications. However, when strength, pressure capacity, and safety are important, Schedule 80 PVC pipe is the better solution.
247Garden Schedule 80 PVC Pipes combine durability, NSF-61 drinking water safety, ASTM D1785 compliance, and competitive pricing. For irrigation, plumbing, agricultural, and commercial water systems, Schedule 80 PVC from 247Garden is a reliable, long-term investment.
[related_products is_auto_added="1"]PVC pipe is widely used in plumbing, irrigation, agriculture, and industrial applications due to its durability, corrosion resistance, and affordability. Two of the most common types are Schedule 40 PVC and Schedule 80 PVC. While they may look similar at first glance, there are important differences that affect performance, safety, and long-term reliability. At 247Garden, […]
A PVC expansion coupling, also commonly called a PVC repair coupling, is designed to fix broken, cracked, or leaking PVC pipes without having to move or replace long sections of pipe.
When a section of PVC pipe is damaged, there is often no room to slide a standard coupling into place because the surrounding pipe is fixed. An expansion coupling solves this problem with a telescoping (sliding) design.
Here is how it works:
- Cut out the damaged section of PVC pipe, leaving two clean, straight pipe ends.
- Glue the expansion coupling onto one pipe end using standard PVC primer and cement.
- The coupling has an extendable sleeve that can be pulled outward.
- Pull the sleeve to extend the coupling and slide it over the second pipe end.
- Glue the second side in place, creating a secure, watertight repair.
The sliding section allows the coupling to expand during installation, making it possible to reconnect two fixed pipe ends without bending or removing additional pipe.
Once glued and cured, the expansion coupling becomes a permanent repair, restoring the strength and function of the pipe.
Why Use a PVC Expansion Coupling for Repairs
- Eliminates the need to move or replace long pipe runs
- Ideal for tight spaces and underground repairs
- Faster and cleaner than cutting out large sections
- Strong solvent-weld connection once installed
- Commonly used in irrigation, plumbing, and water lines
Recommended PVC Expansion Couplings from 247Garden
247Garden offers high-quality PVC expansion couplings designed specifically for pipe repair applications.
- Available sizes from 1/2 inch to 2 inches
- Larger sizes available upon request
- Compatible with standard Schedule 40 PVC pipe
- Slip/socket ends for solvent-weld installation
- Ideal for irrigation systems, water lines, and general PVC repairs
Whether you are fixing a small leak or repairing a cracked underground line, 247Garden PVC expansion couplings provide a simple, reliable solution that saves time and labor.
[related_products is_auto_added="1"]A PVC expansion coupling, also commonly called a PVC repair coupling, is designed to fix broken, cracked, or leaking PVC pipes without having to move or replace long sections of pipe. When a section of PVC pipe is damaged, there is often no room to slide a standard coupling into place because the surrounding pipe […]
Here are some common questions customers ask about Schedule 80 PVC pipe, especially in industrial, irrigation, plumbing, and water treatment applications. These are also great FAQ topics for product pages or blogs.
- What is Schedule 80 PVC pipe used for?
Schedule 80 PVC pipe is used in applications that require higher pressure ratings and thicker walls than Schedule 40. Common uses include industrial fluid handling, chemical processing, reverse osmosis systems, commercial irrigation, and compressed air (non-hazardous). - What is the difference between Schedule 40 and Schedule 80 PVC pipe?
The main difference is wall thickness and pressure rating. Schedule 80 has thicker walls and can handle higher pressure, while Schedule 40 is lighter, less expensive, and more commonly used for residential plumbing and irrigation. - Does Schedule 80 PVC have a higher pressure rating?
Yes. Schedule 80 PVC pipe generally has a higher pressure rating than Schedule 40 of the same size, especially at smaller diameters. Exact pressure ratings depend on pipe size and operating temperature. - Can Schedule 80 PVC be used for potable (drinking) water?
Yes, as long as the pipe is NSF-61 certified, it is safe for potable water applications. Always check product certifications before use. - Is Schedule 80 PVC pipe compatible with Schedule 40 fittings?
Yes. Schedule 80 and Schedule 40 PVC pipes have the same outside diameter (OD), so they can be connected using standard PVC fittings. However, pressure ratings should match the weakest component in the system. - Is Schedule 80 PVC suitable for outdoor use?
Yes. Schedule 80 PVC is suitable for outdoor use, but UV exposure can weaken PVC over time. Painting the pipe or using UV-resistant coatings is recommended for long-term outdoor installations. - Can Schedule 80 PVC pipe be used for compressed air?
While Schedule 80 PVC is stronger than Schedule 40, PVC is generally not recommended for compressed air in industrial settings due to safety concerns. Local codes and OSHA guidelines should always be followed. - What temperature can Schedule 80 PVC handle?
Schedule 80 PVC is typically rated for up to 140°F (60°C). Pressure ratings decrease as temperature increases, so derating is required for hot applications. - Why is Schedule 80 PVC pipe gray?
Schedule 80 PVC is usually gray to help distinguish it from white Schedule 40 pipe and to indicate its industrial-grade application. - Is Schedule 80 PVC more expensive than Schedule 40?
Yes. Due to its thicker walls, higher pressure rating, and industrial use, Schedule 80 PVC pipe costs more than Schedule 40. - Can Schedule 80 PVC be threaded?
Yes, Schedule 80 PVC can be threaded, but over-tightening can cause cracking. Threaded connections should be used carefully and sealed with PTFE tape or approved thread sealant. - What industries commonly use Schedule 80 PVC pipe?
Common industries include:
- Water treatment and filtration
- Reverse osmosis systems
- Chemical processing
- Agriculture and irrigation
- Aquaculture and hydroponics
- Industrial plumbing and manufacturing
Looking to Buy Schedule 80 PVC Pipes Online?
247Garden offers high-quality Schedule 80 PVC pipes built for demanding applications where strength, pressure resistance, and reliability matter. Manufactured to ASTM D1785 standards and NSF-61 certified, these pipes are approved for potable water and suitable for industrial, agricultural, irrigation, filtration, and water treatment systems.
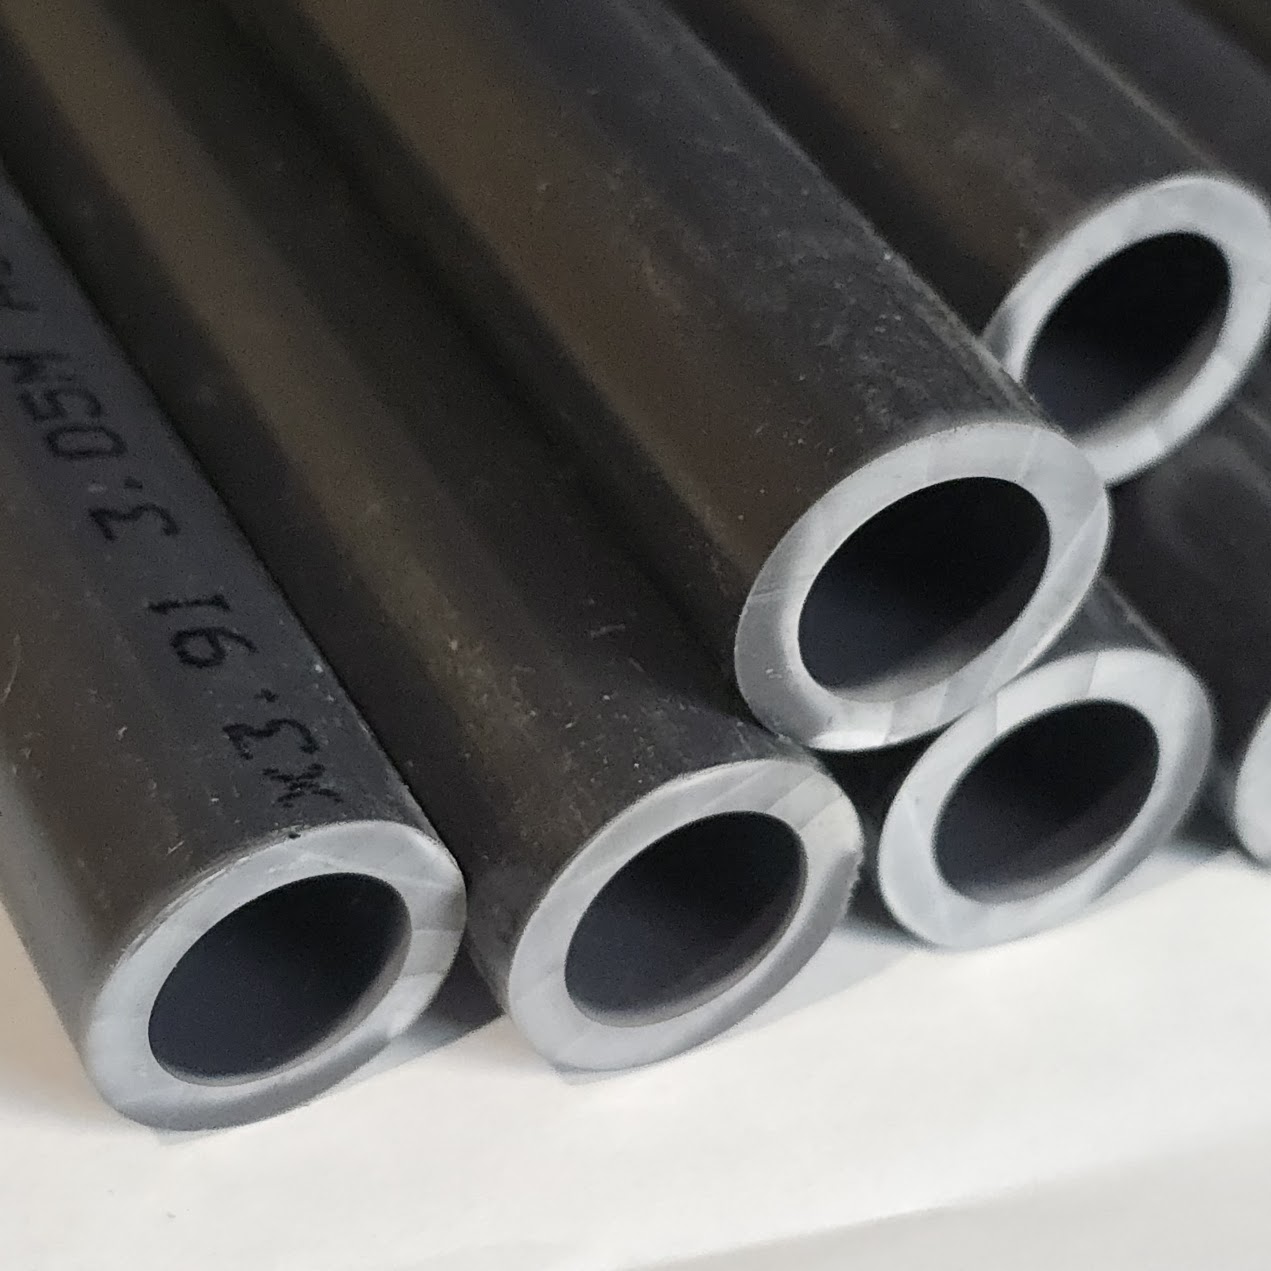
Available now in 1/2 inch, 3/4 inch, and 1 inch diameters, our Schedule 80 PVC pipes come in full 10-foot lengths and also support cut-to-size orders, helping reduce waste and shipping costs while meeting exact project requirements. The thick-wall gray PVC construction provides higher pressure ratings than Schedule 40, making it ideal for commercial and industrial use.
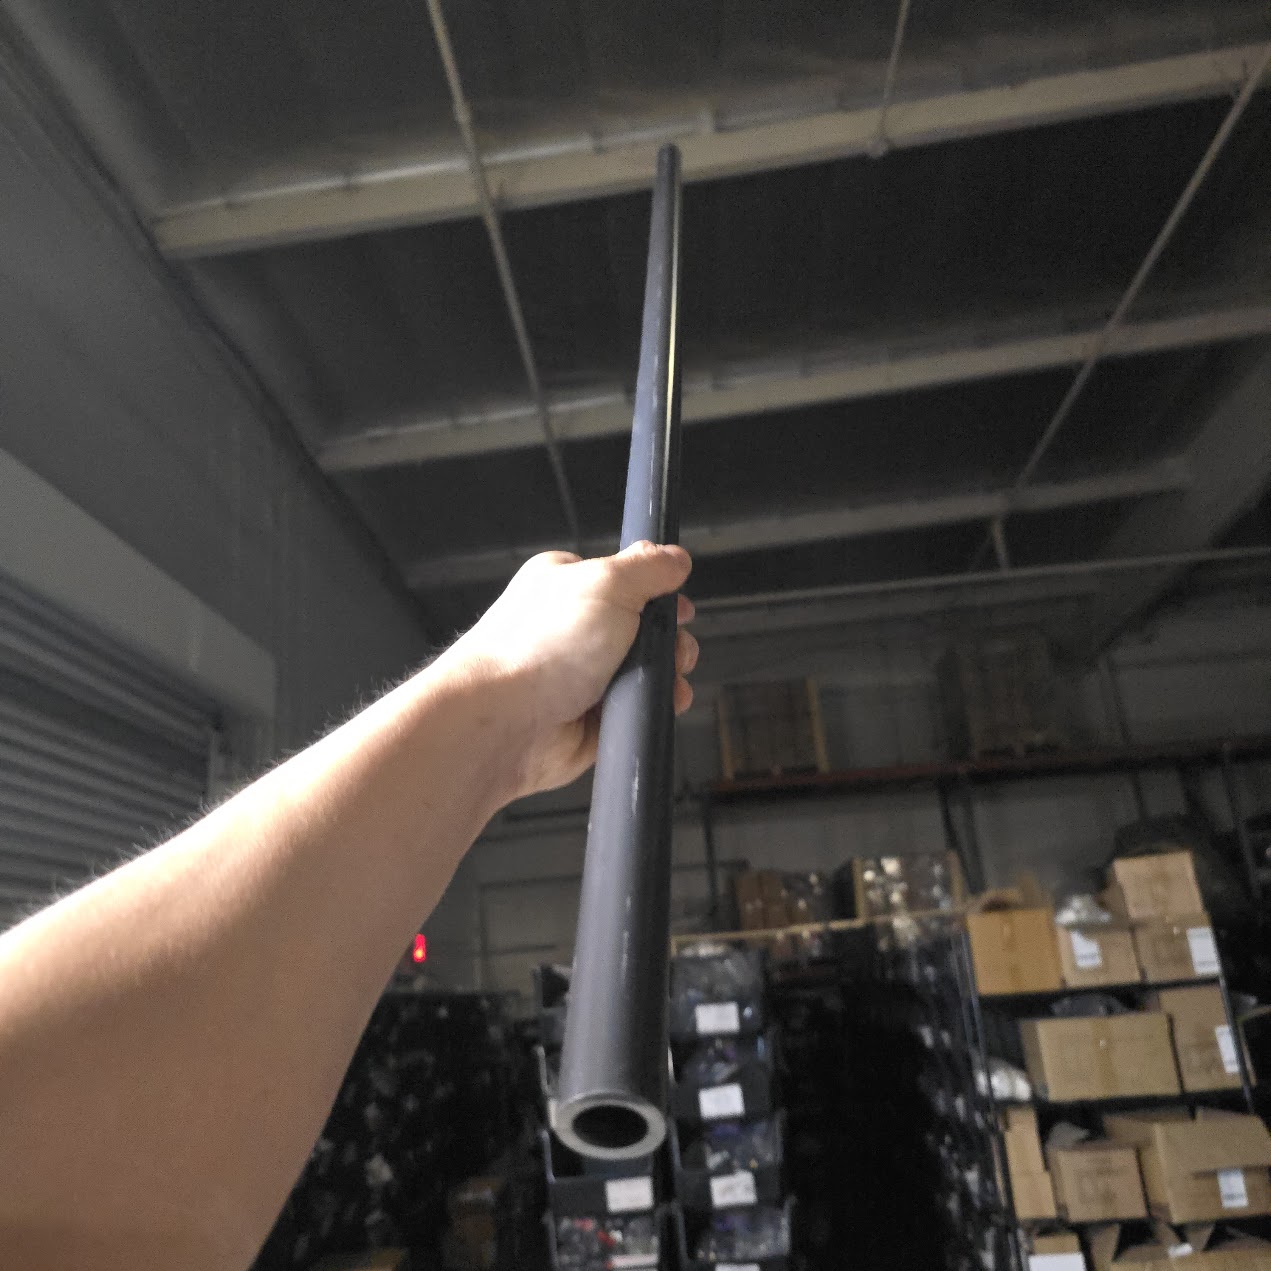
Whether you are building a new system or upgrading an existing one, 247Garden Schedule 80 PVC pipes deliver consistent performance, code compliance, and long-term durability you can trust.
[related_products is_auto_added="1"]Here are some common questions customers ask about Schedule 80 PVC pipe, especially in industrial, irrigation, plumbing, and water treatment applications. These are also great FAQ topics for product pages or blogs. Looking to Buy Schedule 80 PVC Pipes Online? 247Garden offers high-quality Schedule 80 PVC pipes built for demanding applications where strength, pressure resistance, […]
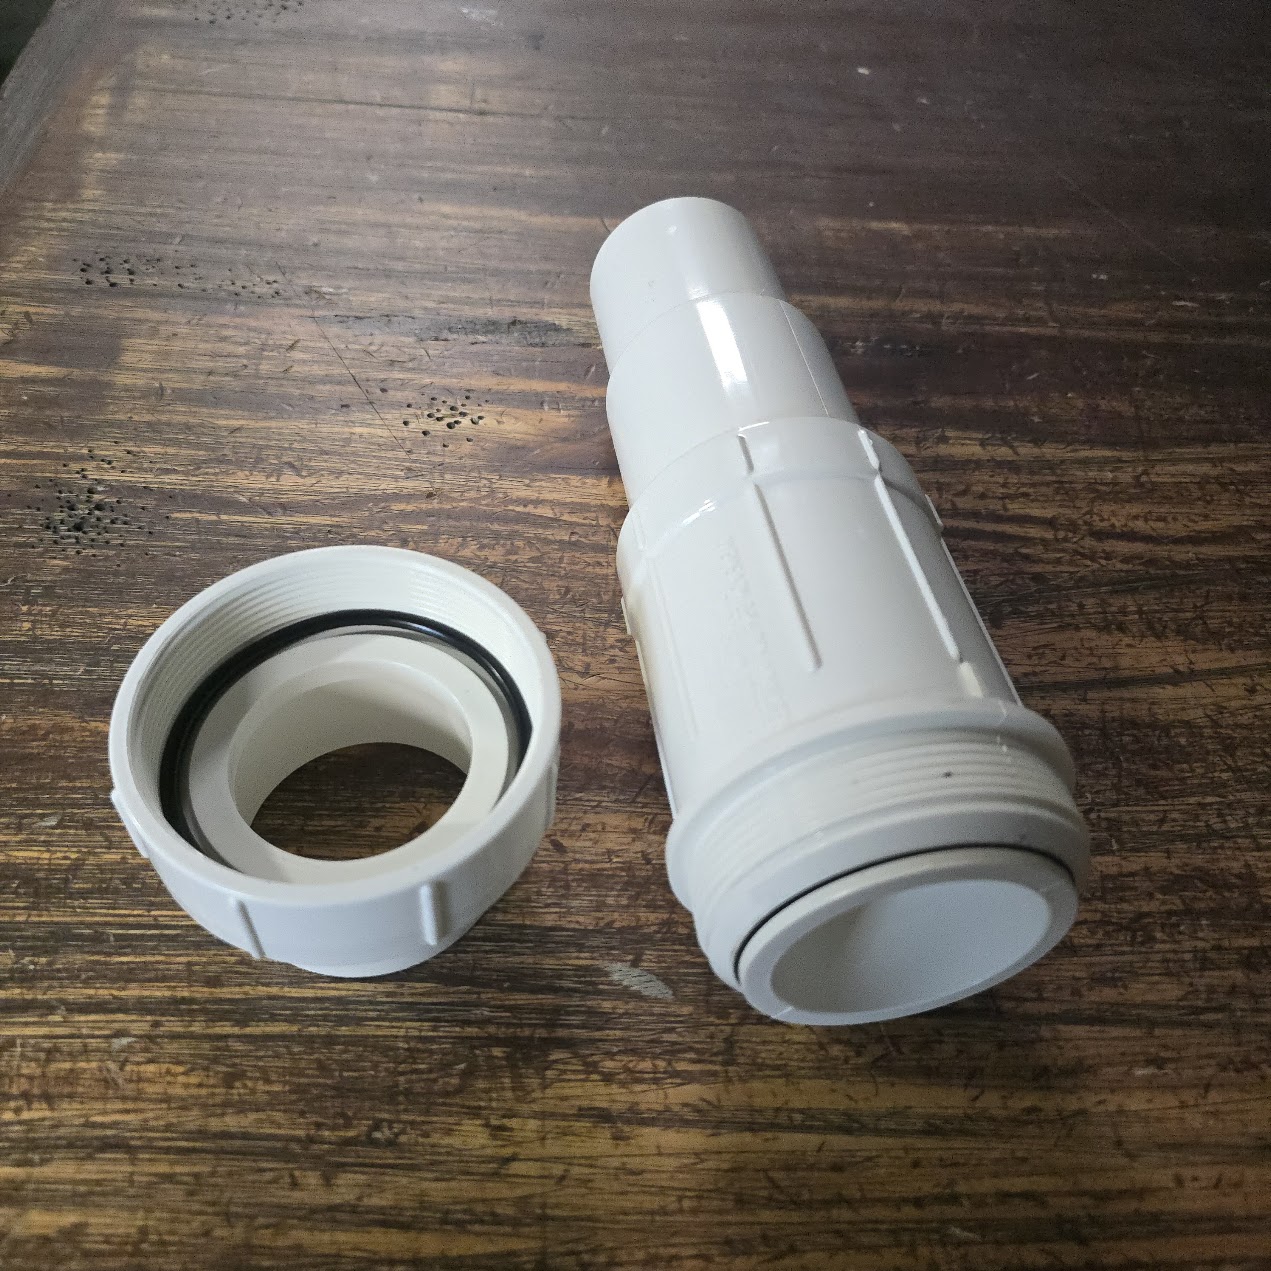
A PVC expansion coupling is a specialized repair coupling for PVC pipe, designed to make fixing leaks fast and reliable. When a section of pipe develops a leak or crack, you don’t need to replace the entire line. Instead, you can cut out the damaged section and use an expansion coupling to restore the pipeline quickly.
How PVC Expansion Couplings Work
The repair process is simple:
- Cut out the damaged section of PVC pipe.
- Glue the expansion coupling onto one exposed end of the pipe using standard PVC primer and cement.
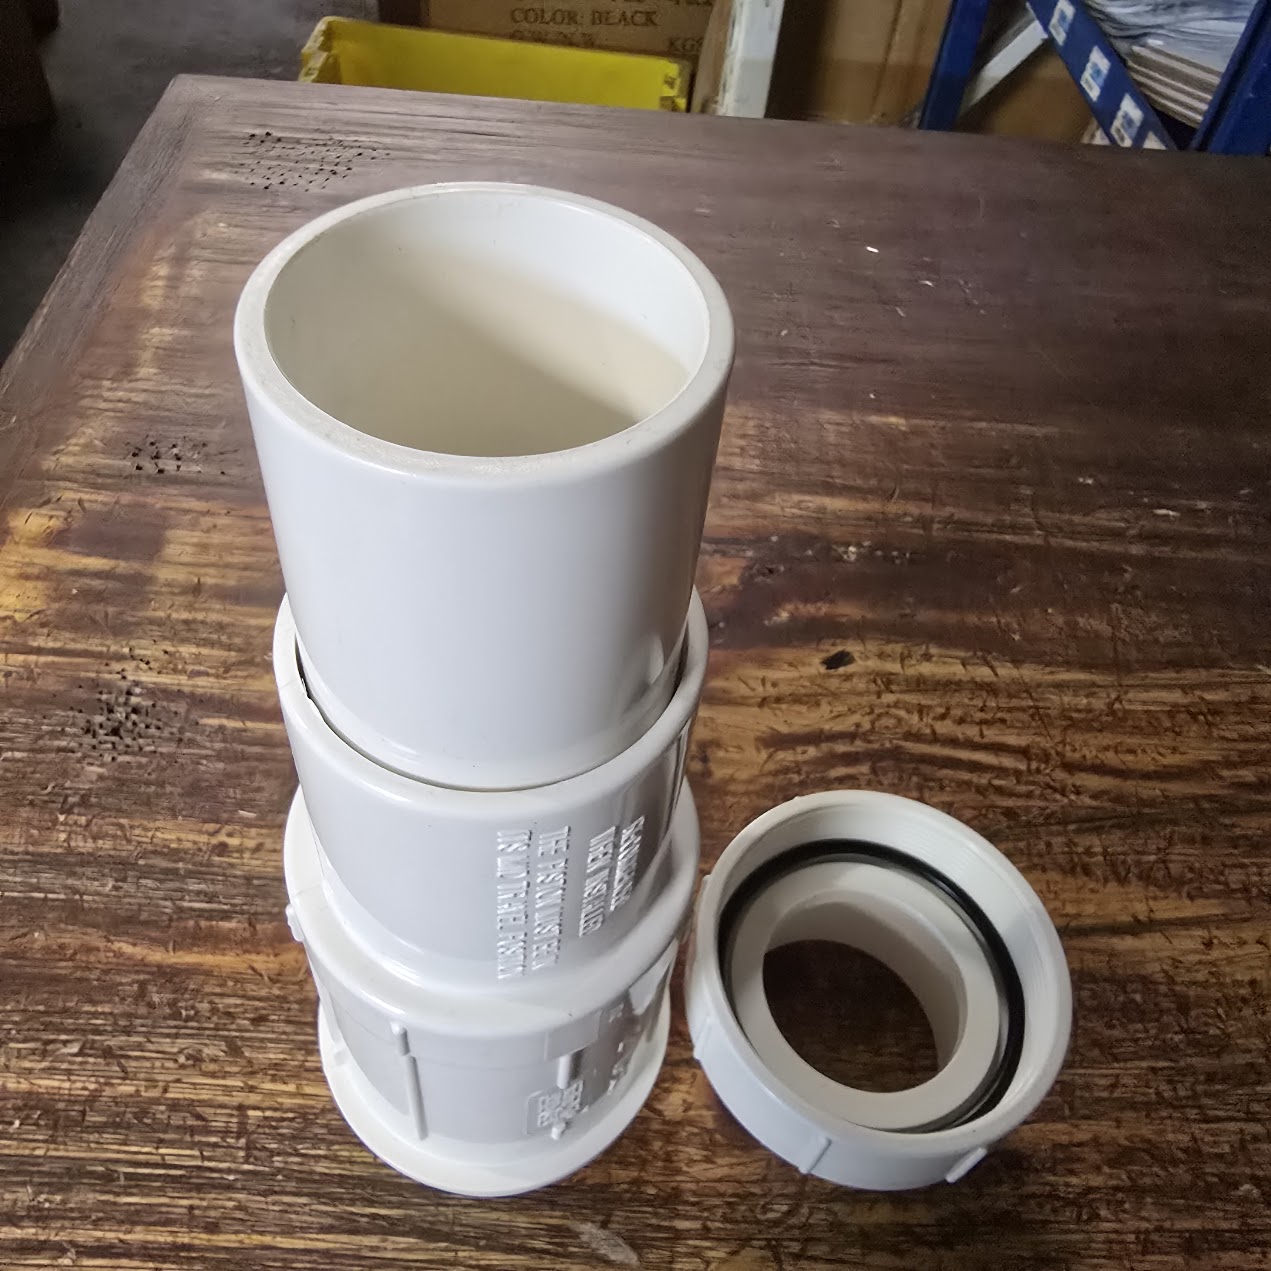
- Expand the coupling by pulling on its telescoping end to create space for the second pipe connection.
- Attach the other exposed pipe end using a standard PVC coupling, completing the repair.
This design allows the coupling to absorb small movements in the pipe caused by temperature changes or ground shifts, preventing future leaks and reducing stress on the plumbing system.
Why Use PVC Expansion Couplings
- Quick Repairs: Only the damaged section is removed, saving time and material.
- Flexible: The telescoping design accommodates expansion, contraction, and slight misalignment.
- Durable: Made from PVC, these couplings resist corrosion and chemical exposure.
- Reliable Seal: Provides a watertight connection that restores system integrity.
Recommended 247Garden PVC Expansion Couplings
247Garden offers a full range of PVC expansion couplings to fit most plumbing systems:
- Sizes from 1/2 inch to 2 inches for standard residential or irrigation lines.
- Larger sizes up to 4 inches for high-flow or commercial applications.
- Schedule 40 PVC construction compatible with standard PVC pipes and fittings.
Using 247Garden expansion couplings ensures a secure, leak-free repair while allowing for future pipe movement and stress absorption.

Conclusion
PVC expansion couplings are a practical, effective solution for repairing leaks in PVC piping. With 247Garden expansion couplings, you can fix broken pipes quickly, maintain system reliability, and extend the life of your plumbing or irrigation setup.
[related_products is_auto_added="1"]A PVC expansion coupling is a specialized repair coupling for PVC pipe, designed to make fixing leaks fast and reliable. When a section of pipe develops a leak or crack, you don’t need to replace the entire line. Instead, you can cut out the damaged section and use an expansion coupling to restore the pipeline […]
A male PVC union is a convenient fitting because it combines a threaded male adapter with a union connection, making systems easier to install, service, and modify without cutting pipe. It is made up of several key components that work together to create a removable, leak-resistant threaded connection. Each part has a specific purpose.
- Male Threaded End (MPT)
This side has male pipe threads designed to screw into a female-threaded fitting, valve, pump, or equipment port. It provides a secure threaded connection without permanent bonding. - Union Nut
The large threaded nut allows the union to be tightened or loosened by hand or with minimal tools. This is what makes the fitting removable without cutting pipe. - Union Body (Socket or Spigot End)
The opposite side of the male threads typically has a socket (slip) end that is solvent-welded to PVC pipe, or occasionally a spigot end that fits into another socket fitting. - O-Ring or Gasket Seal
Located inside the union, the O-ring creates a watertight seal when the union nut is tightened. This seal allows repeated assembly and disassembly without leaks.
How It All Works Together
- The male threaded end connects to equipment or a female-threaded fitting.
- The socket end is glued to the PVC pipe.
- The union nut compresses the O-ring, forming a tight seal while still allowing the connection to be separated later.
This design makes PVC male unions ideal for systems that require frequent maintenance, equipment removal, or future modifications without damaging the piping.
Why It’s Nice to Use a Male PVC Union
- Easy Disassembly for Maintenance
The union nut allows you to disconnect equipment quickly. This is especially useful when pumps, filters, or valves need servicing or replacement. - Threaded Compatibility
The male threaded end connects directly into female-threaded components such as pumps, tanks, manifolds, or metal fittings without additional adapters. - Reduced System Downtime
Since you do not need to cut or re-glue pipe, maintenance jobs take less time and reduce the risk of damaging nearby plumbing. - Cleaner, More Professional Installations
A male union reduces the number of fittings needed, resulting in a compact and organized layout. - Reusable Connection
Unlike glued fittings, the union can be reused multiple times, which saves cost during future upgrades or system reconfigurations.
Common Scenarios to Use a Male PVC Union
- Pump Connections
Ideal for connecting pumps with female-threaded ports so the pump can be removed without disturbing the rest of the piping. - Filtration and Treatment Systems
Common in reverse osmosis systems, water treatment units, and chemical dosing systems where components require regular servicing. - Irrigation Manifolds
Allows quick removal of control valves, filters, or pressure regulators during repairs or seasonal maintenance. - Aquaculture and Aquarium Systems
Makes it easy to disconnect equipment such as protein skimmers, UV sterilizers, and return pumps. - Industrial and Commercial Plumbing
Used where threaded equipment must be accessed frequently, such as cooling systems or process piping. - Hydroponics and Fertigation Systems
Enables fast removal of nutrient injectors, filters, and pumps while maintaining leak-free threaded connections.
Recommendation: 247Garden Male PVC Unions (1/2 in. to 2 in.)
For reliable performance, 247Garden Schedule-40 Male PVC Unions are a solid choice. Currently available in sizes from 1/2 inch to 2 inches, these unions are made from durable PVC and designed for consistent sealing and easy disassembly. They are well-suited for irrigation, hydroponics, water treatment, and general plumbing applications where regular maintenance is expected.
Using 247Garden male PVC unions helps create a system that is service-friendly, efficient, and built to last.
[related_products is_auto_added="1"]A male PVC union is a convenient fitting because it combines a threaded male adapter with a union connection, making systems easier to install, service, and modify without cutting pipe. It is made up of several key components that work together to create a removable, leak-resistant threaded connection. Each part has a specific purpose. How […]